
Last updated: November 6, 2026
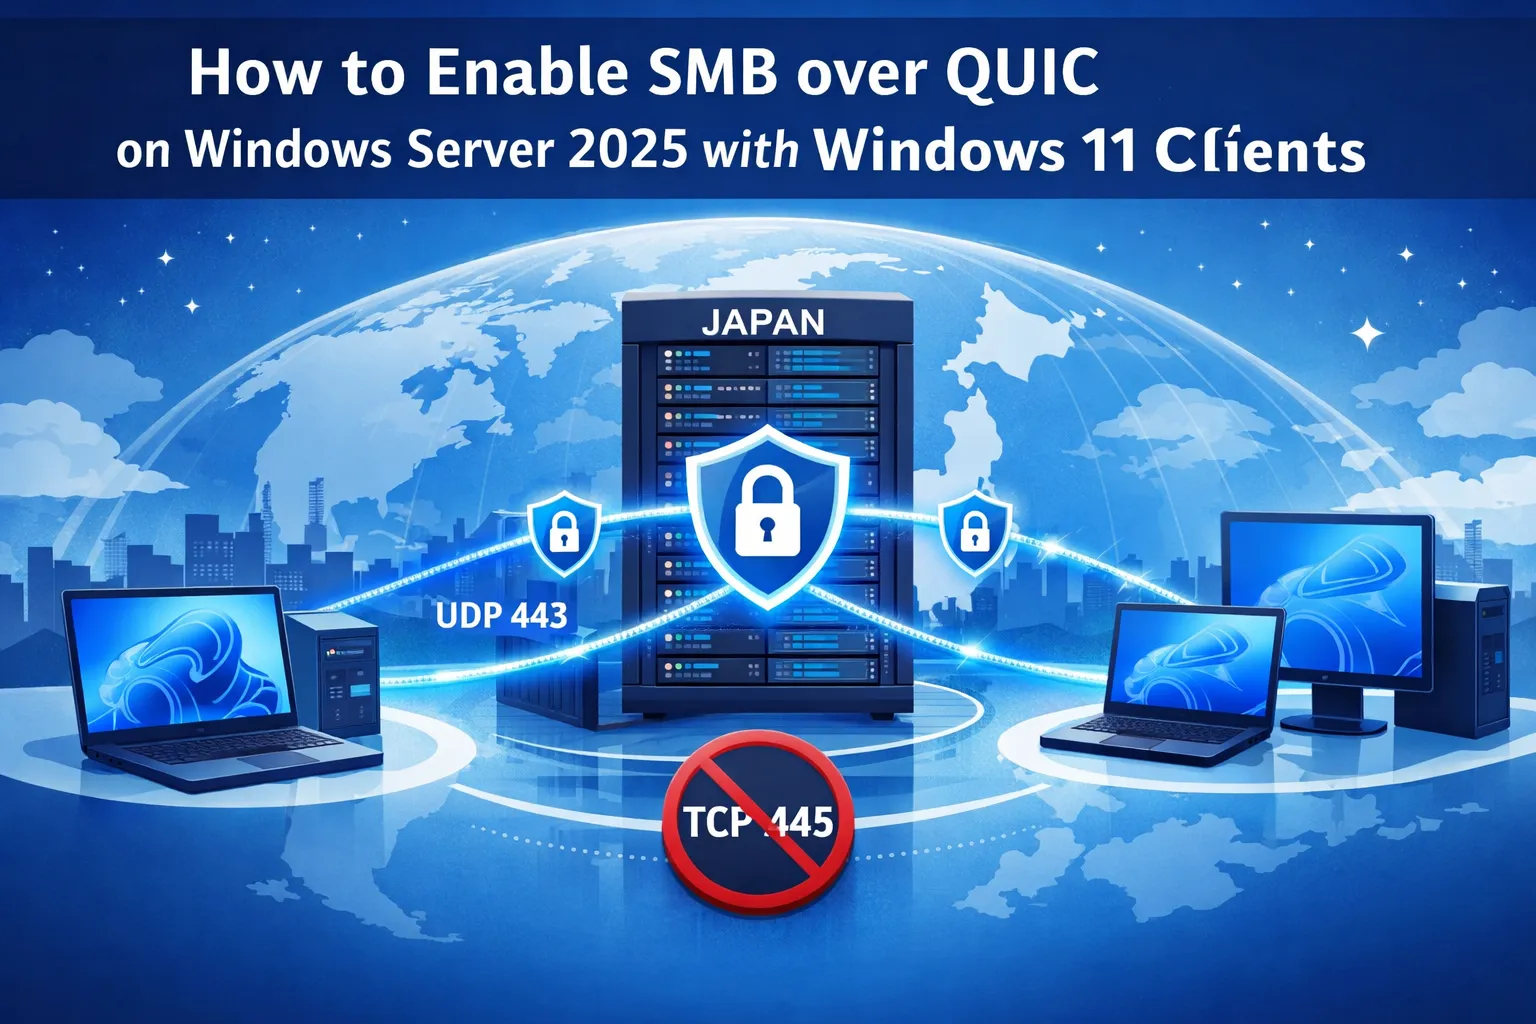
SMB over QUIC on Windows Server 2025 lets you publish file shares over the internet without exposing TCP port 445. Instead of putting users on a full VPN just to open a shared folder, SMB traffic is wrapped in TLS 1.3 and sent over UDP 443, so Windows 11 users get a normal mapped drive while you keep a tight control on exposed ports. It’s especially useful for remote workers, overseas teams, and organizations with rules about where their data is stored.
This guide walks you through the full setup with copy-paste PowerShell commands: installing the File Server role, getting and mapping a TLS certificate, opening the firewall, creating a secure share, connecting from Windows 11 and confirming that QUIC is really in use. It also covers certificate renewal, troubleshooting, and running the server on a Japan Windows VPS.
Quick answer
- What it is: SMB file sharing carried inside an encrypted QUIC (TLS 1.3) connection on UDP 443, so you never have to open TCP 445 to the internet.
- What you need: Windows Server 2025 (any edition, including Standard), Windows 11 clients, a domain name and a trusted TLS certificate for that name.
- How to set it up: install the File Server role, map the certificate with
New-SmbServerCertificateMapping, allow UDP 443, then connect withNET USE ... /TRANSPORT:QUIC. - Good to know: Windows clients try TCP first and use QUIC only when TCP fails or when you request QUIC, so add
/TRANSPORT:QUICwhen testing.
What Is SMB over QUIC?
SMB over QUIC is a way to reach ordinary SMB file shares safely over untrusted networks such as the public internet. Instead of exposing TCP port 445, which attackers constantly scan for, SMB is carried inside QUIC, a modern transport protocol that runs over UDP 443 and is always encrypted with TLS 1.3. For users, it looks and behaves like a normal network drive.
Microsoft first introduced it in Windows Server 2022 Datacenter: Azure Edition. From Windows Server 2025, it’s available in every edition, so you can use it on a standard Windows Server VPS.
How it works
- The file server listens on UDP 443 and proves its identity with a TLS certificate for its domain name.
- A Windows 11 client connects to that domain name over UDP 443 and sets up an encrypted QUIC tunnel.
- All SMB traffic, including sign-in, travels inside the tunnel. Nothing from the SMB session is visible on the network.
- SMB over QUIC isn’t on until you map a certificate and enable it on the server.
SMB over QUIC vs VPN vs opening port 445
| SMB over QUIC | VPN | Open TCP 445 | |
|---|---|---|---|
| Port exposed | UDP 443 | The VPN’s port | TCP 445 |
| Encryption | Always (TLS 1.3) | Always | Only if SMB encryption is turned on |
| What users reach | File shares only | The whole network (or what you allow) | File shares |
| Client software | Built into Windows 11 | VPN client needed | Built in |
| Works for macOS, Linux, older Windows | No | Yes | Yes |
| Recommended for the internet | Yes | Yes | No |
In short: if your users are on Windows 11 and only need file shares, SMB over QUIC is simpler than a VPN. If they also need other internal systems, or use Macs, a VPN is still the better fit.
Prerequisites
- Server: Windows Server 2025 (any edition), with administrator access.
- Clients: Windows 11. Version 24H2 or later is recommended, because it adds connection logging and alternative port support. For full details, see SMB over QUIC client requirements and 24H2 changes.
- Domain name: a hostname such as
fileserver.example.comthat points to the server’s public IP address. Don’t plan on connecting by IP address: the certificate must match a name, and IP addresses force weaker NTLM sign-in. - TLS certificate for that hostname, trusted by your clients:
- Issued by a public CA (such as Let’s Encrypt) or your own enterprise CA
- Server Authentication purpose (EKU), with the private key included
- The hostname listed in the Subject Alternative Name (SAN)
- RSA 2048-bit or ECDSA P-256 key or stronger, with SHA-256 or stronger
- Accounts: Active Directory is recommended, but a standalone (workgroup) server with local user accounts also works. That’s the typical setup on a single VPS, and it’s what this guide uses.
Note: Windows Admin Center doesn’t currently support configuring SMB over QUIC on Windows Server 2025, so this guide uses PowerShell throughout.
Step 1: Install the File Server Role
Open PowerShell as Administrator on the server. First, confirm the Windows version:
Get-ComputerInfo -Property WindowsProductName, OsBuildNumberYou should see Windows Server 2025. Then install the File Server role:
Install-WindowsFeature -Name FS-FileServer -IncludeManagementToolsIf the output shows Restart Needed: Yes, restart the server before continuing.
Step 2: Point Your Domain Name at the Server
At your DNS provider, create an A record for your chosen hostname (for example, fileserver.example.com) pointing to the server’s public IP address.
Check it from any computer:
Resolve-DnsName fileserver.example.comThe result should show your server’s public IP address. Do this before getting the certificate, because most public CAs check the domain name when issuing it.
Step 3: Install a TLS Certificate
You have three common options:
- Let’s Encrypt (free): a free ACME client for Windows, such as win-acme, can request the certificate and save it straight into the local computer’s certificate store. Let’s Encrypt certificates last 90 days, so see the renewal section below.
- A paid public certificate: buy it from a certificate provider and import the PFX file (see the command below).
- Your enterprise CA: request the certificate from Active Directory Certificate Services. Your domain-joined clients will already trust it.
To import a PFX file (replace the path with your own; you’ll be asked for the PFX password):
Import-PfxCertificate -FilePath "C:\certs\fileserver.pfx" `
  -CertStoreLocation Cert:\LocalMachine\My `
  -Password (Read-Host "PFX password" -AsSecureString)
Find the certificate for your hostname. Set your hostname once in $fqdn; the following steps reuse it. This picks the newest valid certificate for that name that has a private key:
$fqdn = "fileserver.example.com"

$serverCert = Get-ChildItem Cert:\LocalMachine\My |
  Where-Object { $_.DnsNameList.Unicode -contains $fqdn -and $_.HasPrivateKey -and $_.NotAfter -gt (Get-Date) } |
  Sort-Object NotAfter -Descending | Select-Object -First 1

$serverCert | Format-List Subject, DnsNameList, NotAfter, Thumbprint
If nothing is shown, the certificate isn’t in the local computer store, doesn’t include your hostname, has expired, or was imported without its private key.
Step 4: Map the Certificate and Enable SMB over QUIC
In the same PowerShell window, tell the SMB server which certificate to use, then turn SMB over QUIC on:
New-SmbServerCertificateMapping -Name $fqdn -Thumbprint $serverCert.Thumbprint -StoreName My
Set-SmbServerConfiguration -EnableSMBQUIC $true -Force
Check both settings:
Get-SmbServerCertificateMapping
Get-SmbServerConfiguration | Select-Object EnableSMBQUIC
You should see a mapping with your hostname and EnableSMBQUIC : True.
Step 5: Open UDP 443 and Keep TCP 445 Closed
Allow SMB over QUIC through Windows Firewall:
New-NetFirewallRule -DisplayName "SMB over QUIC (UDP 443)" -Direction Inbound -Protocol UDP -LocalPort 443 -Action AllowCheck that nothing allows TCP 445 from outside. This lists any enabled inbound rules for TCP 445:
Get-NetFirewallPortFilter |
  Where-Object { $_.Protocol -eq "TCP" -and $_.LocalPort -contains "445" } |
  Get-NetFirewallRule |
  Where-Object { $_.Enabled -eq "True" -and $_.Direction -eq "Inbound" } |
  Select-Object DisplayName, Profile, Action
On a server with a public IP address, such as a VPS, it’s safest to block TCP 445 outright. A block rule takes priority over any allow rule:
New-NetFirewallRule -DisplayName "Block SMB TCP 445 inbound" -Direction Inbound -Protocol TCP -LocalPort 445 -Action BlockOnly do this if the server doesn’t also need to share files over a private network using normal SMB.
Confirm the server is listening on UDP 443:
Get-NetUDPEndpoint -LocalPort 443If you use a hardware firewall, cloud security group or NAT in front of the server, allow inbound UDP 443 there as well. A common mistake is allowing TCP 443 only.
For a deeper look at the ports, DNS and certificate checks involved, see our SMB over QUIC firewall guide. If you’re changing firewall rules on a VPS for the first time, read how to configure firewall rules on a Windows VPS without breaking remote access before you block anything.
Step 6: Create a User and a Secure Share
Create a dedicated local account for file access (skip this if you use Active Directory groups). Use a long, unique password, because this account can be reached from the internet:
$pw = Read-Host "Password for fileuser" -AsSecureString
New-LocalUser -Name "fileuser" -Password $pw -FullName "File share user" -PasswordNeverExpires
Create the folder and share it with that user only. By default, a new share gives everyone read access, so this sets the permission explicitly:
New-Item -ItemType Directory -Force -Path "C:\Shares\Projects"

New-SmbShare -Name "Projects" -Path "C:\Shares\Projects" `
  -ChangeAccess "$env:COMPUTERNAME\fileuser" `
  -FolderEnumerationMode AccessBased
Give the same user permission on the folder itself (NTFS):
icacls "C:\Shares\Projects" /grant "$env:COMPUTERNAME\fileuser:(OI)(CI)M"M means Modify (read, write and delete). Use RX instead for read-only access. In an Active Directory environment, grant access to groups such as CORP\FileServer-Projects-Modify instead of individual users.
Finally, note the server’s computer name. Users with local accounts will sign in as COMPUTERNAME\fileuser:
$env:COMPUTERNAMEStep 7: Connect from Windows 11
On the Windows 11 computer, open Command Prompt or PowerShell and map the share, forcing QUIC so you know it’s working. Replace FILESERVER with the computer name from Step 6:
NET USE Z: \\fileserver.example.com\Projects /TRANSPORT:QUIC /USER:FILESERVER\fileuser /PERSISTENT:YESYou’ll be asked for the password. If the command succeeds, the connection is using QUIC, because /TRANSPORT:QUIC doesn’t fall back to TCP.
The PowerShell equivalent (for domain accounts already signed in):
New-SmbMapping -LocalPath "Z:" -RemotePath "\\fileserver.example.com\Projects" -TransportType QUICUsers can also type \\fileserver.example.com\Projects into File Explorer. Without /TRANSPORT:QUIC, Windows tries TCP 445 first and only switches to QUIC when TCP fails, which is the normal behavior from outside your network.
Testing before DNS is ready? Add the hostname to the client’s hosts file (C:\Windows\System32\drivers\etc\hosts) with the server’s IP address. Always connect by name, never by IP address.
Step 8: Verify That QUIC Is Being Used
On Windows 11 version 24H2 or later, every SMB over QUIC connection is logged as event ID 30832. Check for it with:
Get-WinEvent -FilterHashtable @{ LogName = "Microsoft-Windows-SMBClient/Connectivity"; Id = 30832 } -MaxEvents 5 |
  Select-Object TimeCreated, Message
You can also find these events in Event Viewer under Applications and Services Logs > Microsoft > Windows > SMBClient > Connectivity.
To confirm QUIC is enabled on the client:
Get-SmbClientConfiguration | Select-Object EnableSMBQUICKeep It Running: Certificate Renewal
When a certificate is renewed, it gets a new thumbprint, and SMB over QUIC keeps using the old one until you update the mapping. If connections suddenly fail after a renewal, this is usually why.
Run this on the server after each renewal. It finds the newest certificate for your hostname and replaces the mapping:
$fqdn = "fileserver.example.com"

$newCert = Get-ChildItem Cert:\LocalMachine\My |
  Where-Object { $_.DnsNameList.Unicode -contains $fqdn -and $_.HasPrivateKey -and $_.NotAfter -gt (Get-Date) } |
  Sort-Object NotAfter -Descending | Select-Object -First 1

Get-SmbServerCertificateMapping | Where-Object Name -eq $fqdn | Remove-SmbServerCertificateMapping -Confirm:$false
New-SmbServerCertificateMapping -Name $fqdn -Thumbprint $newCert.Thumbprint -StoreName My

Get-SmbServerCertificateMapping
With Let’s Encrypt, save these lines as a .ps1 file and set your ACME client to run it after each renewal, so the mapping updates automatically.
Security Best Practices
- Keep TCP 445 closed on the public interface. Only UDP 443 needs to be open.
- Use strong passwords and an account lockout policy. With local accounts, sign-in uses NTLM inside the encrypted tunnel, so guessing passwords is the main risk. For example, lock an account for 30 minutes after 10 failed attempts:
net accounts /lockoutthreshold:10 /lockoutduration:30 /lockoutwindow:30 - Give least privilege: only grant the access each user needs, and never give
Everyonewrite access. - Disable SMBv1 if it’s still present:
Get-SmbServerConfiguration | Select-Object EnableSMB1Protocol Set-SmbServerConfiguration -EnableSMB1Protocol $false -Force - Keep the server and clients updated with Windows security updates.
- Optional: limit access to specific devices. Windows Server 2025 supports SMB over QUIC client access control, which only lets in clients with an approved certificate. Turn it on with
Set-SmbServerCertificateMapping -RequireClientAuthentication $trueand allow clients withGrant-SmbClientAccessToServer. This needs client certificates on every device, so it suits managed company laptops. See Microsoft’s client access control guide in the sources below.
Troubleshooting
| Problem | Likely cause | What to check |
|---|---|---|
“The network path was not found” with /TRANSPORT:QUIC |
UDP 443 blocked, wrong DNS, or QUIC not enabled | Run Resolve-DnsName on the client, then Get-NetUDPEndpoint -LocalPort 443 and Get-SmbServerConfiguration on the server. Check any external firewall allows UDP, not just TCP. |
| Certificate or security error | Hostname not in the certificate, connecting by IP, or untrusted CA | Connect using the exact name in the certificate. For an enterprise CA, install its root certificate on the client. |
| Stopped working suddenly | Certificate renewed or expired | Run Get-SmbServerCertificateMapping and compare the thumbprint with the current certificate. Remap it (see the renewal section). |
| “Access is denied” | Wrong user name format or missing permission | Use COMPUTERNAME\user for local accounts. Check both Get-SmbShareAccess -Name Projects and the folder’s NTFS permissions. |
| Connects, but over TCP instead of QUIC | Normal behavior: TCP is tried first | Use /TRANSPORT:QUIC or -TransportType QUIC to force QUIC. |
| Another program already uses UDP 443 | For example, a web server with HTTP/3 enabled | Use an alternative port (see below). |
Using a different port. If UDP 443 is unavailable, Windows Server 2025 and Windows 11 24H2 or later can use another port. On the server:
New-SmbServerAlternativePort -TransportType QUIC -Port 8443 -EnableInstances Default
New-NetFirewallRule -DisplayName "SMB over QUIC (UDP 8443)" -Direction Inbound -Protocol UDP -LocalPort 8443 -Action Allow
On the client:
New-SmbMapping -LocalPath "Z:" -RemotePath "\\fileserver.example.com\Projects" -TransportType QUIC -QuicPort 8443For deeper problems, compare the SMB event logs on the server and client, or capture traffic with Wireshark to see whether QUIC packets reach the server.
Running SMB over QUIC on a Japan Windows VPS
A practical way to use SMB over QUIC is to run the file server on a Windows Server 2025 VPS hosted in Japan. In this setup:
- The file server sits in a Japan data center, close to Japanese partners, services and users.
- Overseas staff connect to its hostname over UDP 443 from anywhere, with no VPN client.
- Files stay in Japan, which helps if your contracts or customers require data to be stored there.
- A VPS has its own public IP address, so you usually only need the Windows Firewall rules from Step 5.
What about speed from overseas? From our data center in Osaka, we measured about 55 ms to Hong Kong, 77 ms to Singapore and around 155–165 ms to the US. Opening documents and copying large files works well at these distances. Folders with thousands of small files will feel slower than on a local network, as with any remote file share.
For how a Japan server performs from different regions, see Japan VPS vs Singapore VPS: Which Is Better for Your Users in Asia? For more ways teams use servers in Japan, see What Can You Do With a Server in Japan? 7 Uses for Businesses and Gamers.
Data Localization Strategy for Overseas Corporations: Why Storing Data in Japan Matters
Summary
SMB over QUIC on Windows Server 2025 gives Windows 11 users secure access to file shares over the internet, without a VPN and without exposing TCP 445. The setup comes down to four things: a domain name, a trusted certificate mapped to the SMB server, UDP 443 open, and clients connecting by name.
In this guide, you:
- Installed the File Server role and pointed a domain name at the server
- Installed and mapped a TLS certificate, then enabled SMB over QUIC
- Opened UDP 443 and kept TCP 445 closed
- Created a dedicated user and a share with limited permissions
- Connected from Windows 11 and confirmed the connection uses QUIC
- Prepared for certificate renewal and common problems
FAQ
Q1. Do I still need a VPN if I use SMB over QUIC?
Not for file shares. SMB over QUIC gives users encrypted access to shares over UDP 443 without a VPN client. You’ll still need a VPN if users must reach other internal systems, such as databases or management tools, or if they use macOS or Linux. For a VPN option between offices, see SoftEther VPN on Windows: Site-to-Site Bridge from Overseas to Japan.
Q2. Does SMB over QUIC work on Windows Server 2025 Standard edition?
Yes. In Windows Server 2022 it was limited to Datacenter: Azure Edition, but from Windows Server 2025 it’s available in all editions, including Standard and Datacenter.
Q3. Do I need Active Directory?
No. Active Directory is recommended for larger environments, but a standalone server with local user accounts works. Users sign in as COMPUTERNAME\username. Because local accounts use NTLM sign-in, use strong passwords and an account lockout policy.
Q4. Can I use a free Let’s Encrypt certificate?
Yes, as long as it includes your server’s hostname and is installed in the local computer’s certificate store with its private key. Let’s Encrypt certificates renew every 90 days, and each renewal changes the thumbprint, so update the SMB certificate mapping after renewal (the script in this guide does this).
Q5. Which devices can connect?
Microsoft supports Windows 11 and Windows Server 2025 as SMB over QUIC clients. Windows 10, macOS and Linux need another method, such as a VPN. For a checklist of what each Windows 11 device needs, see SMB over QUIC and Windows 11: Client Support, 24H2 Changes, and Deployment Checks.
Q6. Why does my connection use TCP instead of QUIC?
Windows tries TCP 445 first and only uses QUIC when TCP fails or when you request it. Inside your own network, TCP usually succeeds. Add /TRANSPORT:QUIC to NET USE, or -TransportType QUIC to New-SmbMapping, to force QUIC.
Q7. Can I use a port other than UDP 443?
Yes. Windows Server 2025 can listen on an alternative QUIC port with New-SmbServerAlternativePort, and Windows 11 version 24H2 or later can connect to it with New-SmbMapping -QuicPort.
Q8. Can I run SMB over QUIC on a Japan VPS for users overseas?
Yes. Run Windows Server 2025 on a Japan Windows VPS, map a certificate for its hostname and open UDP 443. Users overseas connect by hostname, while the data stays in a Japan data center, which can help with data residency requirements.
Sources: Microsoft Learn: SMB over QUIC, Configure SMB over QUIC client access control, Configure alternative SMB ports
Need a Windows Server in Japan for Your File Shares?
Winserver offers Windows VPS plans from our own data center in Osaka, Japan, with the Windows Server license included, full administrator access and English support. Set up SMB over QUIC and give your team secure file access from anywhere.